
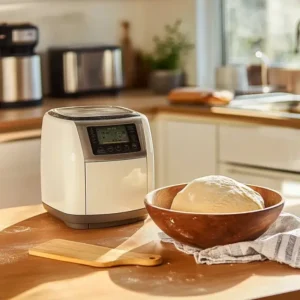
If you’ve ever wondered how to make homemade bread without all the hassle, using the dough cycle on bread machine is your secret weapon. This smart setting takes care of the tough parts mixing, kneading, and rising so you can shape, bake, and enjoy fresh bread, pizza dough, or cinnamon rolls with ease. Whether you’re a beginner or just looking to save time, this guide will walk you through everything you need to know, step by step.
Understanding the Dough Cycle on a Bread Machine
What Is the Dough Cycle?

“A clean bread machine surrounded by simple ingredients, representing the easy beginning of homemade dough preparation.”
The dough cycle is a special program on most bread machines that mixes the ingredients, kneads the dough, and lets it rise but it doesn’t bake it. That’s the cool part. It takes care of the messiest, trickiest parts of bread-making and gives you a soft, puffy dough ready for shaping.
“Think of the dough cycle like a helpful kitchen buddy it does all the tough stuff, and then hands you the fun part!”
Here’s a basic overview of what the dough cycle does:
| Step | What Happens | Time (approx.) |
|---|---|---|
| Mixing | Ingredients are stirred and blended | 5–10 mins |
| Kneading | Dough is pounded and stretched | 15–20 mins |
| First Rise | Dough rests and rises until doubled | 30–60 mins |
| End of Cycle | Machine beeps; dough is ready | – |
By the time the machine beeps, your dough will have the perfect texture soft, stretchy, and full of air bubbles.
Why Use the Dough Cycle Instead of Baking in the Machine?
Good question! While many bread machines have full bake cycles, using just the dough setting gives you more control. You can shape your dough into buns, braids, or pizza crusts things a machine can’t do by itself.
Here’s why a lot of home bakers love it:
- You get a better crust when baking in a regular oven.
- You can add fillings (like cheese or cinnamon) after the dough is ready.
- You avoid the oddly square shape of bread machine loaves.
- It’s easier to make fancy bread types like baguettes or stuffed rolls.
“Using the dough cycle on bread machine gives you flexibility and fun you can turn one dough into many different baked goods.”
How the Dough Cycle Works Step-by-Step
Mixing and Kneading Explained
Once you hit that dough setting, your bread machine gets right to work. First, it mixes the ingredients flour, yeast, water, and so on into one smooth mixture. Then it kneads the dough to build gluten, which gives bread that soft stretchiness we all love.
“Good dough should feel like a soft baby’s cheek not too sticky, not too dry.”
The kneading process is like a little massage for your dough. It stretches and folds it over and over again. This helps trap air, so your bread can rise beautifully.
If you’re curious about using specific machines like Breadman, check out this guide on making just dough with Breadman. It’s super helpful if you’re new to machines or want machine-specific tips.
Here’s a quick look at the ingredients and typical measurements for a basic dough recipe:
| Ingredient | Quantity |
|---|---|
| Bread Flour | 3 cups |
| Warm Water | 1 cup |
| Sugar | 2 tablespoons |
| Salt | 1½ teaspoons |
| Olive Oil | 2 tablespoons |
| Active Dry Yeast | 2¼ teaspoons |
You can also toss in herbs or garlic powder if you want to get fancy just make sure to follow your machine’s manual for ingredient order.
First Rise: What Happens and Why It Matters
After kneading, your machine shifts into the “rest and rise” phase. This is when the yeast works its magic by feeding on the sugar and releasing gas. The dough slowly inflates, doubling in size. This process is called proofing or fermentation.
“Yeast is like a tiny baker living in your dough it eats sugar and breathes out bubbles.”
This first rise is super important. If it doesn’t happen right, your bread might turn out flat or dense. That’s why using the dough cycle on bread machine makes things easier it controls the temp and timing perfectly.
Make sure not to open the lid during this stage. Any cold air could slow down the rise.
What to Do After the Dough Cycle Ends
Removing the Dough and Shaping It
Once the machine beeps, your dough is ready. Take it out and place it on a lightly floured surface. It might feel warm and squishy that’s totally normal.
Now it’s time to get creative. Roll it, braid it, stuff it, or shape it into buns. Here’s a quick list of shapes you can try:
- Classic loaf – great for sandwich bread
- Pizza base – stretch it flat with your hands
- Braided loaf – divide into three ropes and braid them
- Dinner rolls – shape into little balls
“Shaping is your chance to make it your own. Don’t stress just have fun!”
If the dough feels too sticky, add a bit of flour. If it’s too dry, wet your hands slightly and knead gently.
Second Rise and Final Baking Tips
After shaping, your dough needs one more rest. Cover it loosely with a clean towel and let it rise again for about 30–45 minutes, or until it’s puffy.
This step is crucial for a soft texture and fluffy crumb. Skip it, and you might end up with a dense brick instead of a beautiful loaf.
Here’s a tip: Preheat your oven while the dough is doing this second rise. Once it’s ready, bake at 375°F (190°C) for most breads, or 450°F (232°C) for pizza dough.
“Your oven is like the finishing line hot, fast, and the last step in turning dough into gold.”
Don’t forget to check doneness by tapping the bread. It should sound hollow. Let it cool on a wire rack before slicing.
Best Recipes to Try Using the Dough Cycle
Simple White Bread Dough
This one’s a classic. White bread dough is soft, fluffy, and perfect for sandwiches or toast. When using the dough cycle on bread machine, this recipe is a great place to start.
Here’s a simple recipe:
| Ingredient | Quantity |
|---|---|
| Bread Flour | 3 cups |
| Warm Water | 1 cup |
| Butter (softened) | 2 tablespoons |
| Sugar | 1½ tablespoons |
| Salt | 1 teaspoon |
| Dry Yeast | 2¼ teaspoons |
Just dump all the ingredients in your machine (check if your machine wants wet or dry first), select the dough cycle, and press start.
“You don’t need to be a pro to make great bread your machine does most of the work!”
Once the dough is ready, shape it into a loaf, let it rise again for 30–40 minutes, and bake it at 375°F (190°C) for 30 minutes. Easy, right?
Tip: Brush the top with melted butter before baking for that golden-brown crust.
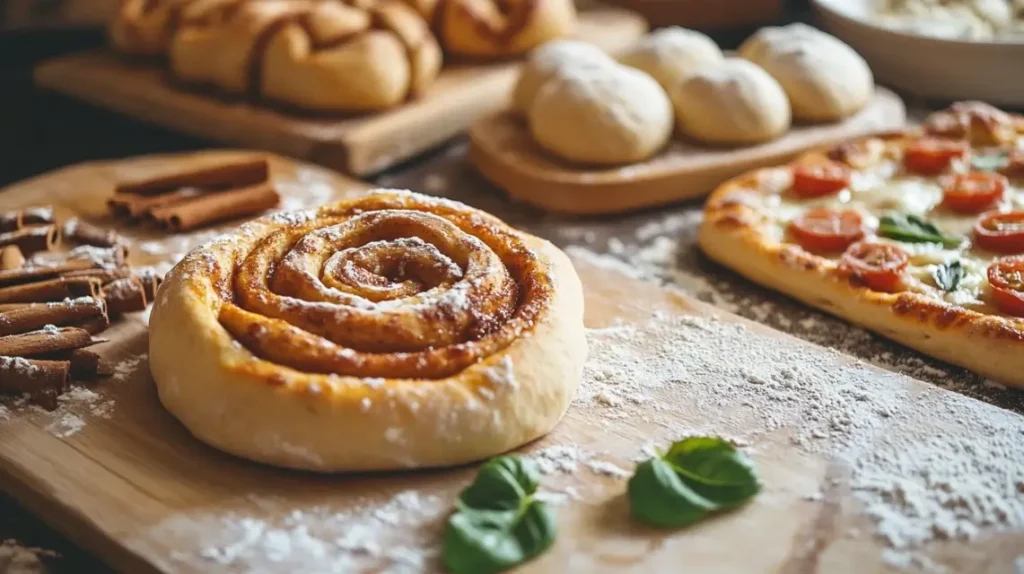
“A showcase of finished baked items like rolls and pizza, made using dough prepared in a bread machine.”
Pizza Dough and Cinnamon Rolls
Ready to level up? You can use the same dough cycle to make more fun treats like pizza crust or sweet cinnamon rolls.
Pizza Dough Recipe
| Ingredient | Quantity |
|---|---|
| All-Purpose Flour | 2½ cups |
| Water | 1 cup (warm) |
| Olive Oil | 2 tablespoons |
| Salt | 1 teaspoon |
| Sugar | 1 teaspoon |
| Yeast | 2 teaspoons |
After the dough cycle finishes, stretch your dough into a circle or rectangle. Add sauce, cheese, and your favorite toppings. Then bake at 450°F (232°C) for 12–15 minutes.
Cinnamon Roll Dough is just like white bread but a bit sweeter. Once the dough is ready, roll it out, spread melted butter, sprinkle cinnamon and sugar, roll it up, slice, and let rise again. Bake at 350°F (175°C) until golden. Add icing if you like it extra sweet.
“The dough cycle is like a magic button press it, walk away, and come back to ready-to-roll dough!”
For more delicious recipe ideas, check out this soft cheese and onion bread on Yuum Recipes. It’s another great way to make use of your dough cycle.
Common Mistakes and How to Avoid Them
Dough Too Sticky or Too Dry
One of the most common complaints when using the dough cycle on bread machine is that the dough turns out either way too sticky or dry. But don’t worry it’s an easy fix.
If your dough is:
- Too sticky: Sprinkle a tablespoon of flour at a time until it’s smooth.
- Too dry or crumbly: Add a teaspoon of water and let the machine knead it in.
You want the dough to be soft and stretchy not gluey, not crumbly. Trust your fingers here. Feel it!
“The perfect dough should pull away from the pan but still be soft to touch.”
Also, make sure you’re measuring ingredients correctly. Too much flour or not enough water throws things off fast.
Over-proofing or Under-proofing Issues
Another common mistake is skipping or rushing the second rise. Remember, after your dough cycle ends, your dough still needs a little more time to rise before baking.
If you bake too soon:
- Your bread might turn out flat.
- It won’t be as soft or fluffy inside.
If you wait too long:
- The dough could rise too much and collapse in the oven.
- It may taste sour from over-fermented yeast.
Pro Tip: Use the poke test. Gently press a finger into the dough. If it springs back slowly, it’s ready to bake. If it pops back too fast, give it a bit more time.
“Bread dough is a bit like Goldilocks not too much, not too little. It needs to rise just right.”
Tips for Perfect Dough Every Time
Best Flour Types to Use for Bread Machines
Choosing the right flour can make a big difference in how your dough turns out. Not all flours are the same some make light, fluffy bread, while others can make it too heavy.
Here’s a quick guide:
| Type of Flour | Best For | Notes |
|---|---|---|
| Bread Flour | Sandwich loaves, pizza dough | High in protein, great for structure |
| All-Purpose Flour | Rolls, cinnamon bread | Softer texture, less chewy |
| Whole Wheat Flour | Hearty, dense bread | May need extra water or gluten |
| Gluten-Free Flour | Allergy-friendly recipes | Needs special recipes and binders |
If you’re using the dough cycle on bread machine, bread flour is usually your safest choice. It has more protein, which helps the dough hold its shape better and rise higher.
“Think of flour like the bones of your bread it holds everything together.”
Want to experiment? Try mixing bread flour with a little whole wheat for a healthier touch. Just remember, whole wheat absorbs more water, so adjust your liquids if needed.
Measuring Ingredients the Right Way
Baking is a bit like science you need to be precise! Even a small mistake in measuring can throw your dough off balance.
Here’s how to do it right:
- Use measuring cups for dry ingredients (like flour and sugar). Don’t scoop from the bag spoon it in and level it off.
- Use a liquid measuring cup for wet stuff like water or milk.
- Double-check your yeast too much can cause over-rising, too little and your bread won’t puff.
“A little too much flour or not enough water? Boom your dough’s a mess.”
Also, always add ingredients in the order your machine suggests. Most ask for wet first, then dry, with yeast on top.
Taking a few extra seconds to measure properly saves you from a floppy or dense loaf later!
Using Dough Cycle for Different Bread Types
Using Dough Cycle for Gluten-Free Recipes
Gluten-free baking can be tricky but your bread machine can actually help a lot. While gluten gives dough its stretchy feel, you can still make tasty gluten-free bread using the dough cycle on bread machine.
Here are a few tips:
- Use a gluten-free flour blend (don’t try using just almond or rice flour alone).
- Add a binder like xanthan gum or psyllium husk to help hold the dough together.
- Dough might feel more like thick batter. That’s okay it still works!
Because gluten-free dough doesn’t stretch the same way, you usually don’t need a second rise. Shape it and bake right after the dough cycle finishes.
“Don’t worry if your dough looks weird gluten-free is a whole different game, but totally doable!”
Whole Wheat and Specialty Dough Variations
Whole wheat dough is full of flavor and fiber, but it’s heavier than white dough. That means you’ll need to help it a little.
To make soft whole wheat bread:
- Use half whole wheat, half bread flour for a lighter texture.
- Add a bit of honey or molasses for flavor and to help it rise.
- Let it rest longer during the second rise for best results.
You can also try fun add-ins like:
- Chopped nuts
- Dried fruit (like raisins or cranberries)
- Herbs or shredded cheese
“The dough cycle takes care of the hard part now you can get creative!”
Don’t be afraid to mix and match. That’s the best part about baking at home you control the ingredients and flavors!
Advantages of the Dough Cycle for Home Bakers
More Control Over Your Bread
One of the best things about using the dough cycle on bread machine is how much control it gives you. You’re not stuck with whatever shape or crust your machine makes when it bakes the bread for you.
Instead, you get to decide:
- How to shape the dough
- What toppings or fillings to add
- Whether to bake in the oven or on a pizza stone
This freedom lets you make so much more than just plain loaves. You can bake rolls, pretzels, calzones, or even breadsticks.
“The dough cycle is like having a helper who handles the hard work then you take over for the fun stuff!”
Saves Time and Effort
Let’s face it kneading by hand can be messy and tiring. And getting the dough to rise just right? That takes practice.
That’s where the dough cycle shines. It mixes, kneads, and even gives your dough its first rise all in one go. While the machine works, you can clean up, prep toppings, or relax.
This is especially helpful for busy families or beginner bakers who want homemade bread without the stress.
Plus, there’s less guesswork involved. Most machines are timed perfectly to help the dough rise just enough not too little, not too much.
“Just press the dough button, walk away, and come back to dough that’s ready to shape.”
Troubleshooting Guide for Dough Cycle Problems
My Dough Didn’t Rise – What Went Wrong?
If your dough didn’t puff up like it should, don’t worry it happens! Here are some common reasons:
- Old or dead yeast: Yeast can expire. Always check the date.
- Water too hot or cold: Yeast likes warm (not hot!) water, around 105–110°F.
- Salt touching yeast: Salt can kill yeast if they mix too early. Keep them separate until kneading starts.
If you’re using the dough cycle on bread machine and the dough doesn’t rise, try again with fresh yeast and proper water temp. That usually does the trick!
“Yeast is picky treat it right and it’ll reward you with fluffy, perfect dough.”
Why Is My Dough Lumpy or Uneven?
This often means something went wrong during mixing or kneading. Maybe the flour stuck to the corners, or the paddle didn’t catch everything.
Try these tips:
- Pause the cycle after a few minutes and check the dough.
- Use a spatula to scrape down the sides if needed.
- Make sure you’re measuring flour and water properly.
If your dough feels tough or breaks easily, it might be over-kneaded or too dry. Add a splash of water and knead again until it’s smooth.
“Dough isn’t supposed to be perfect at first feel it, fix it, and trust your hands.”
Simple Bread Machine Dough
Equipment
- Bread Machine
- Measuring cups and spoons
Ingredients
Main Ingredients
- 3 cups bread flour
- 1 cup warm water
- 2 tbsp butter softened
- 1½ tbsp sugar
- 1 tsp salt
- 2¼ tsp active dry yeast
Instructions
- Select the “Dough” cycle and press start. Let the machine knead and rise the dough about 60–90 minutes depending on model.
- Add the bread flour on top of the liquid ingredients, spreading it evenly to cover the water.
- Make a small well in the center of the flour and add the yeast (keeping it dry and away from the water).
- Select the “Dough” cycle and press start. Let the machine knead and rise the dough about 60–90 minutes depending on model.
- Once the cycle is complete, use the dough to shape rolls, pizza crust, or loaf bread and bake as desired.
Notes
Conclusion
And there you have it! Using the dough cycle on bread machine is one of the easiest ways to make fresh, delicious dough at home. It saves time, reduces the mess, and takes care of the tricky parts like kneading and rising so you can focus on shaping and baking your creations.
Whether you’re making white bread, pizza dough, cinnamon rolls, or even gluten-free bread, the dough cycle gives you a strong, simple starting point. It’s perfect for beginners and super helpful for pros who just want to speed things up.
“When you learn how to use the dough cycle, you’re not just making bread you’re creating possibilities.”
So go ahead, dust off that bread machine, try some recipes, and have fun with it. Because homemade dough is just a button away.