
Who doesn’t love the smell of fresh bread filling up the kitchen? Now imagine a warm, soft loaf that’s not only vegan but also gluten-free and made in a bread machine with hardly any effort. Sounds like magic, right?
This guide is your go-to for making a vegan gluten free bread recipe for bread machine that’s actually soft, tasty, and super easy to whip up. Whether you’re new to plant-based baking or you’ve had your share of gummy or crumbly bread fails, don’t worry we’ve got your back.
Let’s kick things off with why this bread is totally worth baking in the first place!
Why Choose Vegan Gluten Free Bread in a Bread Machine
The Benefits of Using a Bread Machine for Plant-Based Diets
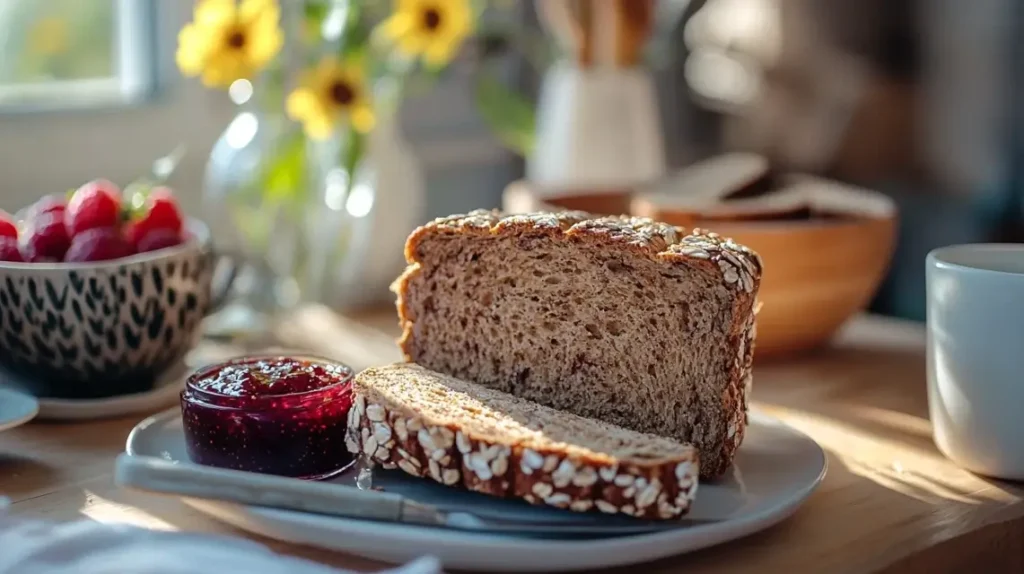
“Serve your fresh bread with plant-based spreads for a healthy start.”
Alright, let’s be real. Baking bread the traditional way? It takes time. You’ve gotta mix, knead, rise, rest, rise again… yikes. If you’ve got school, work, or, you know, a life, that’s a lot to juggle.
That’s where the bread machine comes in. Just toss in the ingredients, press a button, and go do your thing. When you come back bam! a warm loaf is waiting. It’s like having your own little kitchen robot.
“It takes just five minutes to mix everything together and let the bread machine do the rest.” Camilla Sanderson, recipe creator
Bread machines are also great for:
- Saving electricity (they use less than ovens)
- Avoiding a hot kitchen in summer
- Making super consistent loaves every time
How Gluten-Free and Vegan Needs Overlap in Bread Making
You might think gluten-free and vegan sounds tricky. After all, you’re removing both gluten (the stuff that makes bread stretchy) and eggs (which help bind things together).
But here’s the thing: once you know the secret ingredients, it’s not hard at all.
When you go gluten-free and vegan:
- You avoid common allergens like dairy and wheat
- You make bread that’s kinder to your tummy
- You can eat more whole foods, which are great for your health
And with the right flour combo and helpers like flaxseed and psyllium husk, your bread won’t just be edible it’ll be delicious.
“This bread is soft, squishy, and perfect for toast. And it’s so much healthier than store-bought!” A happy reader
Health Advantages of This Recipe Combo
This isn’t just about food preferences it’s about feeling good. Vegan and gluten-free bread can help with:
- Digestive issues (like bloating from wheat)
- Food allergies or intolerances
- Sticking to a plant-based lifestyle
Plus, this recipe uses mostly wholegrain flours, meaning it’s packed with:
- Fiber
- Minerals
- No preservatives or weird additives
Quick Nutrition Snapshot (Per Slice)
Here’s a sneak peek at how one slice stacks up nutritionally:
| Nutrient | Amount per slice |
|---|---|
| Calories | 122 kcal |
| Carbs | 25g |
| Protein | 2g |
| Fiber | 3g |
| Fat | 2g |
| Sugar | 1g |
| Sodium | 225mg |
This loaf is light, nutritious, and won’t weigh you down. It’s perfect for breakfast, snacks, or even as sandwich bread!
Understanding the Ingredients
Key Ingredients in Vegan Gluten-Free Bread
When it comes to baking a vegan gluten free bread recipe for bread machine, the ingredients play a huge role in how the bread turns out. You can’t just toss in regular flour and expect things to work. Gluten-free and vegan baking needs a bit more care but once you get it, it’s super easy.
Here’s a quick look at the all-stars of this recipe:
- Brown rice flour – adds structure and mild flavor.
- Sorghum or oat flour – gives a soft texture and a rich taste.
- Psyllium husk – works like glue to hold everything together.
- Flaxseed meal – replaces eggs and helps the bread rise.
- Tapioca or arrowroot starch – makes the loaf light and fluffy.
- Olive oil – keeps the bread moist and soft.
- Yeast – makes the bread rise (don’t skip it!).
- Salt and a tiny bit of sugar – boost flavor and help yeast work.
These ingredients are simple and natural, and they work well together to give your bread great texture and taste.
Wholegrain Flours vs. Starches
Using only one kind of flour doesn’t cut it in gluten-free baking. That’s why we use a blend of wholegrain flours and starches.
Wholegrain flours like brown rice, sorghum, and millet bring nutrients and structure. But on their own, they can make the bread feel too dense.
On the flip side, starches like tapioca or potato starch make the bread light and soft but don’t offer much nutrition.
That’s why most good recipes follow a smart rule: 2 parts wholegrain to 1 part starch. This gives the best mix of health and texture.
Substitutes for Eggs and Gluten
Without eggs and gluten, bread dough can fall apart or turn gummy. So how do we fix that?
We use two superfoods:
- Flaxseed meal: When mixed with water, it becomes thick like an egg. This helps the bread rise and stay soft.
- Psyllium husk: This soaks up water and forms a gel, holding the bread together so it doesn’t fall apart in the machine.
Together, these two replace what gluten and eggs normally do and they’re 100% plant-based!
Why Psyllium Husk and Flaxseed Work So Well
You might be wondering, “Why not just use one of them?” Great question! The truth is, they work best as a team.
- Flaxseed brings the rise.
- Psyllium adds the structure.
Too much of one? The bread turns gummy. Not enough of the other? The loaf collapses. But when you use the right balance, your bread turns out soft, chewy, and perfect for toast or sandwiches.
If you’re still exploring swaps and ingredient hacks, chia seed drinks for weight loss might also be a good read for fiber-rich ideas.
Getting the Right Texture Without Gluten or Eggs
Why Bread Texture Is Tricky in Vegan Gluten-Free Recipes
Making bread that’s soft and fluffy without eggs or gluten is no small feat. Gluten gives regular bread its stretchiness, and eggs help hold it all together. Without them, your loaf can turn out crumbly, flat, or even mushy in the middle.
This is why so many gluten-free vegan bread attempts don’t go well. But don’t worry with a little knowledge and the right method, your bread can look and feel just like “normal” bread!
How to Get Soft and Springy Bread Without Gluten
Here’s the good news: even without gluten and eggs, you can get that soft, squishy texture we all love. The secret is in:
- Mixing well before baking: This makes sure the flours and starches blend nicely.
- Using psyllium husk and flaxseed: These create the structure and help the loaf rise.
- Letting the bread cool fully: It firms up as it cools, so don’t rush to slice it!
Another helpful trick is not to over-proof the dough. Gluten-free bread doesn’t need a long rise, and if it rises too much, it can fall in the middle.
Tip: Always use the gluten-free setting on your bread machine if it has one. It’s designed for shorter cycles, which works better for delicate dough.
Common Problems and How to Avoid Them
Here are a few problems you might run into and how to fix them:
Problem: Bread is too gummy
– Cause: Too much psyllium or wet dough.
– Fix: Cut back a little on water or psyllium.
Problem: Loaf sinks in the middle
– Cause: Over-proofed or too much yeast.
– Fix: Use gluten-free setting and stick to the recipe.
Problem: Flour spots on top
– Cause: Dry ingredients not mixed in well.
– Fix: Stir the dough in the pan before starting the machine.
Problem: Bread crumbles when sliced
– Cause: Sliced while still warm.
– Fix: Let the loaf cool for at least an hour.
By making these small tweaks, your vegan gluten free bread recipe for bread machine will turn out amazing every time.
Step-by-Step Bread Machine Instructions
Prep the Wet and Dry Ingredients Properly
Before you even press that “Start” button on your bread machine, a little prep goes a long way. And don’t worry it only takes a few minutes.
Start by mixing the flaxseed and psyllium husk with warm water. Let it sit for about five minutes. It’ll turn into a jelly-like mix. This is super important because it helps the bread stay together and rise nicely.
While that’s sitting, gather your flours, starches, oil, yeast, salt, and sugar. Measuring everything accurately is key. In gluten-free baking, even small changes can affect the whole loaf.
You can mix the dry ingredients in a bowl first or directly in the bread machine pan just be sure to stir them with a spatula (not metal!) so everything blends well.
Using this order helps avoid dry patches:
- Mix wet ingredients first (flax-psyllium mixture + oil + water).
- Add dry ingredients (flours, starches, salt, sugar).
- Top with the yeast.
Doing it this way helps the yeast work better, especially if you’re using a delay timer on your bread machine.
How to Mix Everything Before Starting the Machine
Even though bread machines are designed to mix, gluten-free dough needs a little help up front. The flours and starches don’t always mix well on their own, so a quick stir before baking really helps.
Here’s what to do:
- Once all ingredients are in the pan, use a spatula to gently stir the mix until everything looks combined. Don’t worry about making it perfect the machine will finish the job.
- Make sure there are no big dry lumps or powdery spots.
- Smooth out the top of the dough before closing the lid.
That’s it! Now you’re ready to set the machine.
What Setting to Use on Your Bread Machine
For this vegan gluten free bread recipe for bread machine, always choose the gluten-free setting if your machine has one. This setting is made to skip the long kneading and proofing cycles that regular bread needs, which helps your gluten-free dough stay stable.
If your machine doesn’t have a gluten-free setting, don’t panic! Use the shortest basic bread cycle something that mixes, rises, and bakes in less than 2 hours. Long cycles can make the dough rise too much and then collapse.
Here’s a typical gluten-free cycle:
- Mix: 20–25 minutes
- Rise: 35–40 minutes
- Bake: 50–55 minutes
After baking, remove the pan and place the loaf on a wire rack. Let it cool completely before slicing. This helps the bread firm up, making it easier to cut without crumbling.
Choosing the Best Gluten-Free Flours for This Recipe
The Top 5 Gluten-Free Flours to Use
Picking the right flours is one of the most important steps in making a great vegan gluten free bread recipe for bread machine. Each flour adds something different to the mix some give structure, others add softness or flavor.
Here are five gluten-free flours that work really well:
- Brown Rice Flour – A strong base that holds up during baking.
- Sorghum Flour – Adds a “bready” taste and protein.
- Millet Flour – Makes the loaf soft and light.
- Buckwheat Flour – Great for earthy flavor (just a little goes a long way).
- Oat Flour (gluten-free certified) – Mild and slightly sweet; blends well with others.
Try mixing two or three of these for the best results. Don’t use just one flour your loaf may turn out too dense or crumbly.
For more delicious recipes and tips, check out other easy meal ideas over at Yuum Recipes!
When to Use Oat, Millet, or Teff
Each of these grains adds its own magic to the recipe, so let’s break it down:
- Oat Flour: Light and soft, great for everyday use. Too much, though, and the bread might not rise well. Keep it under 100 grams.
- Millet Flour: Makes your bread fluffy! It’s also easy to find and neutral in flavor.
- Teff Flour: Adds a strong flavor and dense texture. Use in small amounts (about 30 grams or less) to avoid heaviness.
Switching between these flours is okay, but always stick to the general rule: ⅔ wholegrain, ⅓ starch. This keeps your bread balanced and helps it bake evenly in the bread machine.
For best results, keep notes on the combos you try you might just discover your own favorite mix!
Bread Machine Tips Just for This Recipe
Why Mixing Before Baking Helps
When using a bread machine, it’s tempting to just dump everything in and press “Start.” But for a vegan gluten free bread recipe for bread machine, this isn’t the best move.
Gluten-free flours behave differently. They don’t blend as smoothly, and some are lighter than others. This means they can float or clump up if not mixed well first.
Here’s why you should always mix before hitting start:
- Even blending: It prevents dry patches or gooey spots.
- Better rise: The yeast works best when evenly spread.
- Smoother loaf: The dough sets better in the pan.
A quick stir with a silicone spatula is all it takes. Don’t overthink it! Just make sure no dry flour is left sitting on top or in the corners of the pan.
Choosing the Best Machine Settings
Most modern bread machines have a gluten-free setting, and that’s your best choice. Why? Because gluten-free dough doesn’t need long kneading or rising times like regular bread.
This setting:
- Keeps the dough firm so it won’t collapse.
- Bakes faster, so the bread doesn’t dry out.
- Helps shape the loaf better with less handling.
If your machine doesn’t offer a gluten-free setting, try this instead:
- Use the shortest cycle.
- Choose a basic “quick bread” or “rapid bake” setting.
- Avoid settings with long proof times (that’s when it can sink!).
Also, it’s smart to check the dough during the first few minutes of mixing. If it looks too thick or too runny, you can still fix it by adding a spoon of water or flour.
Tip: Once the baking starts, don’t open the lid. Let the machine do its thing until it beeps.
Recipe: Vegan Gluten Free Bread for Bread Machine
Full Ingredient List with Helpful Swaps
Here’s the full list of what you’ll need to make this delicious vegan gluten free bread recipe for bread machine. These ingredients are easy to find, and you can even switch some of them if needed.
Dry Ingredients:
- 120g brown rice flour
- 120g sorghum flour (or oat flour)
- 30g millet flour (or buckwheat)
- 30g corn flour or teff flour
- 75g arrowroot starch
- 75g tapioca starch
- 1½ tsp salt
- 1 tsp sugar
- 1½ tsp instant yeast
Wet Ingredients:
- 500g warm water
- 2 tbsp ground flaxseed
- 2–3 tbsp psyllium husk
- 1 tbsp olive oil
How to Make It (Step-by-Step)
Let’s keep it super simple. Follow these steps for a soft, fluffy, and tasty loaf.
- Mix the flax and psyllium in warm water. Stir well and let it sit for 5 minutes. It’ll thicken into a gel that’s your egg replacement!
- Add all dry ingredients to a mixing bowl or straight into the bread pan.
- Pour in the wet mix, including oil and the flax-psyllium gel.
- Stir gently using a spatula. Make sure all dry parts get moist. This helps avoid white flour patches in the crust.
- Place the pan into the machine. Choose the gluten-free setting or a short cycle.
- Start the machine and wait. You don’t need to do anything now just let it bake!
- Once done, take the pan out carefully. Turn the loaf onto a wire rack and let it cool completely before slicing.
Don’t skip the cooling! Gluten-free bread sets while it cools. Cutting it too soon might make it fall apart.
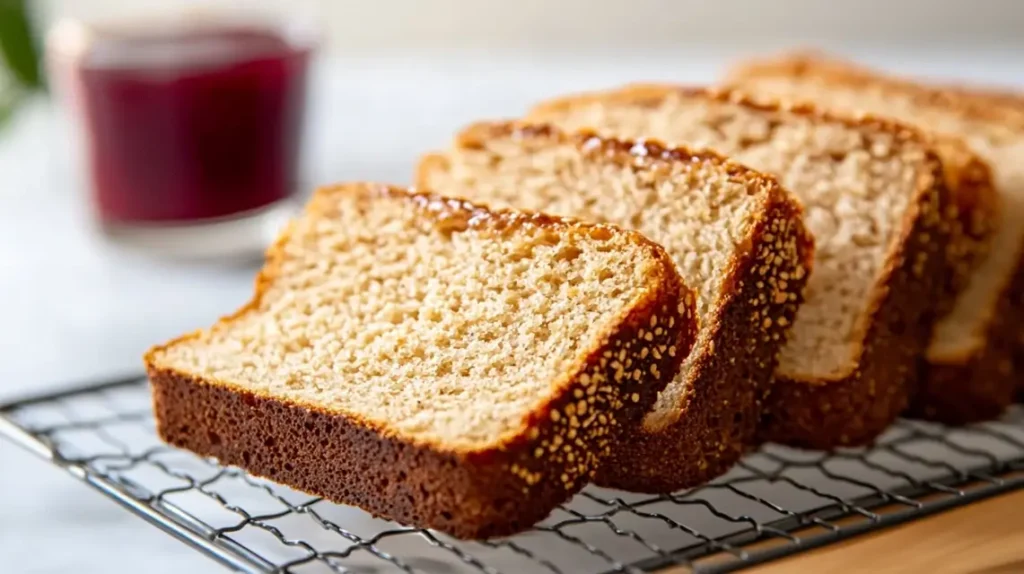
“Here’s what your loaf should look like soft, golden, and easy to slice!”
This recipe makes a loaf that’s great for toast, sandwiches, or just spreading some almond butter on top. It’s soft, slightly chewy, and best of all it’s made without eggs, dairy, or gluten.
For more simple and delicious recipes, check out the healthy baking recipes guide on Yuum Recipes!
Storage Tips for Homemade Vegan Gluten Free Bread
How Long the Bread Lasts at Room Temperature
So, you’ve made your delicious loaf of vegan gluten free bread in the bread machine now what? You probably want to know how long it stays fresh.
Here’s the thing: because this bread has no preservatives (which is a good thing!), it won’t last as long as store-bought bread. At room temperature, it’s best to eat it within 24 to 36 hours. After that, it starts to dry out or get too soft.
If you plan to eat it quickly, just keep it in a clean, dry bag or bread box. Avoid plastic bags if the bread is still warm it can make it soggy.
Best Way to Store It in the Fridge or Freezer
Want to keep it longer? You have two great options.
- Fridge: Wrap the bread in a paper towel and place it in a container or zip bag. It’ll stay fresh for about 3–4 days. Just warm it for a few seconds in the microwave before eating it’ll feel just-baked!
- Freezer: If you want to store it for later, slice the loaf first. Then freeze the slices in a sealed bag. That way, you can take out only what you need. Toast straight from the freezer or defrost for 20–30 seconds in the microwave.
By freezing in slices, you save time and waste less. This also makes your vegan gluten free bread recipe for bread machine perfect for meal prepping!
Troubleshooting Common Issues
Why Your Loaf Might Collapse in the Bread Machine
Baking gluten-free vegan bread can sometimes feel tricky, especially the first time. One common issue? A loaf that rises too much and then sinks in the middle.
Here’s what might be going wrong:
- Too much water: The dough should be thick, not runny. Try reducing the water slightly.
- Over-proofing: If your machine’s cycle is too long, the bread might rise too much and fall. Use the gluten-free setting or a short cycle.
- Wrong flour mix: Some blends, like all-purpose gluten-free mixes, don’t always work well. Stick to the recipe we shared, or use similar wholegrain and starch combinations.
Even if your loaf falls, it can still taste great especially as toast!
What to Do If Your Bread Is Too Dense or Sticky
Another common problem is bread that’s too heavy or gummy inside. But don’t worry this is often easy to fix.
Here’s what could help:
- Let it cool fully: Cutting the bread too soon traps steam inside, making it sticky.
- Check your psyllium and flax: Using too much can cause gumminess. Always measure carefully!
- Mix well before baking: Poor mixing causes uneven baking, leaving wet spots inside.
If your bread is too dense, try switching one of the flours for something lighter like oat or millet flour. And always follow the mix ratio two-thirds wholegrain, one-third starch.
Over time, you’ll get a feel for what works best in your kitchen!
Easy Vegan Gluten-Free Bread for Bread Machine
Equipment
- Bread Machine
- Mixing Bowl (optional, if pre-mixing psyllium gel)
- Kitchen Scale
Ingredients
Dry Ingredients
- 120 g brown rice flour
- 120 g sorghum flour or oat flour
- 30 g millet flour or buckwheat flour
- 30 g corn flour or teff flour
- 75 g arrowroot starch
- 75 g tapioca starch
- 1½ tsp salt
- 1 tsp sugar
- 1½ tsp instant yeast
Wet Ingredients
- 500 g warm water
- 2 tbsp ground flaxseed
- 2–3 tbsp psyllium husk flakes or powder
- 1 tbsp olive oil
Instructions
- In a small bowl, whisk the warm water with flaxseed and psyllium husk. Let sit for 5–10 minutes to form a gel.
- In the bread machine pan, add the wet gel mixture and olive oil first.
- In a separate bowl, mix all dry ingredients (flours, starches, salt, sugar, and yeast).
- Gently add the dry mixture on top of the wet ingredients in the bread machine.
- Select the gluten-free or basic cycle and press start. Let machine knead and bake fully, following your model’s instructions.
- Once done, let the bread cool completely before slicing to prevent gumminess.
Notes
Conclusion
Making the perfect vegan gluten free bread recipe for bread machine might seem hard at first but it really isn’t! Once you know the right flours to use, how to mix them, and which machine setting to choose, you’re on your way to warm, homemade bread that’s soft, tasty, and 100% plant-based.
With the steps, tips, and fixes we’ve shared, you can now bake with confidence. Whether it’s for breakfast toast or a sandwich at lunch, this recipe will become a favorite in your kitchen.
So, grab your bread machine and start baking because fresh, homemade vegan bread is just a button away!