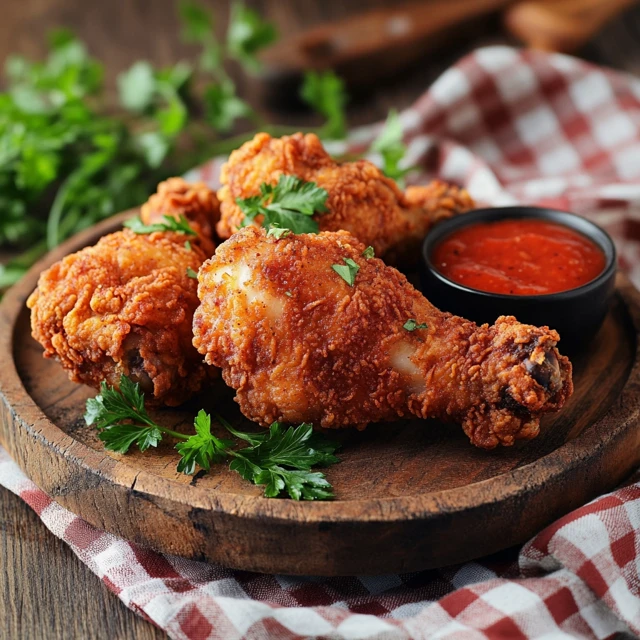
Who doesn’t love fried chicken? The crispy coating, the tender, juicy meat inside, it’s comfort food at its best. But what happens when you’re out of buttermilk? Or maybe you’re avoiding it due to dietary preferences? Don’t worry, I’m here to show you how to make fried chicken recipe without buttermilk that’s just as finger-licking good.
Let’s dive into whipping up this delicious dish with simple ingredients you probably already have at home. Whether you’re a kitchen novice or a seasoned pro, this recipe is straightforward, customizable, and bound to impress!
Table of contents
- Why Make Fried Chicken Without Buttermilk?
- Kitchen Tools and Equipment You’ll Need
- Step-by-Step Guide to Making Fried Chicken Without Buttermilk
- Achieving the Perfect Fry
- Variations of Fried Chicken Without Buttermilk
- Perfect Fried Chicken Without Buttermilk
- Common Problems and Solutions
- Variations of Fried Chicken Without Buttermilk
- Tips for Storing and Reheating Fried Chicken
- Frequently Asked Questions
- Conclusion: Perfect Fried Chicken Without Buttermilk
Why Make Fried Chicken Without Buttermilk?
You might be asking, why bother skipping buttermilk? Here are some common reasons:
- Dietary restrictions: Not everyone can have dairy, and buttermilk alternatives are a game-changer.
- Convenience: Sometimes, you just don’t have buttermilk in the fridge.
- Flavor preference: Buttermilk adds tanginess, but skipping it lets other seasonings shine.
Whatever the reason, the good news is that you don’t need buttermilk to achieve perfectly crispy, flavorful fried chicken.
For more inspiration on creative ingredient swaps, check out Poor Man’s Prime Rib, where simple tweaks create extraordinary flavors.
Essential Ingredients for Fried Chicken Without Buttermilk
Here’s what you’ll need to get started:
| Ingredient | Quantity |
|---|---|
| Chicken pieces (drumsticks, thighs, etc.) | 6-8 pieces |
| All-purpose flour | 2 cups |
| Cornstarch | 1/2 cup |
| Milk (or dairy-free alternative) | 1 cup |
| Eggs | 2 large |
| Garlic powder | 1 tsp |
| Paprika | 1 tsp |
| Black pepper | 1/2 tsp |
| Salt | 1 tsp |
| Vegetable oil (for frying) | Enough for deep frying |
This table includes both essential items and alternatives, so you can tweak the recipe to suit your needs.
Kitchen Tools and Equipment You’ll Need
Before we start cooking, gather these tools to make the process seamless:
- Mixing bowls: For marinating and coating the chicken.
- Tongs: Essential for flipping and removing the chicken.
- Cast-iron skillet or deep fryer: For frying the chicken to perfection.
- Wire rack: To let the chicken cool and stay crispy.
Having the right equipment makes all the difference no one wants soggy fried chicken!
Step-by-Step Guide to Making Fried Chicken Without Buttermilk
Now, the fun begins! Follow these steps to create mouthwatering fried chicken:
Preparing the Marinade

“Fresh chicken drumsticks coated in a flavorful seasoning blend, soaking in spices to enhance taste and tenderness perfect for creating a delicious, home-cooked meal.”
The marinade is where the magic starts. Think of it as the foundation of flavor for your chicken.
- Mix the base: In a large bowl, whisk together milk (or a dairy-free alternative) with two beaten eggs.
- Add seasonings: Stir in garlic powder, paprika, black pepper, and salt. Feel free to adjust the quantities to match your taste.
- Marinate the chicken: Submerge the chicken pieces in the mixture, ensuring they’re fully coated. Cover and let it rest in the fridge for at least 30 minutes (or up to 4 hours for deeper flavor).
Pro Tip: If you’re in a rush, a quick 15-minute marinade still works wonders, but longer is always better!
Coating the Chicken
The coating is what gives fried chicken its signature crunch. Here’s how to nail it:
- Prepare the dredging mix: Combine flour, cornstarch, and a pinch of salt in a separate bowl. Cornstarch is your secret weapon for extra crispiness.
- Coat the chicken: Remove each piece from the marinade, letting excess liquid drip off, and toss it in the flour mixture. Press firmly to ensure a thick, even coating.
Pro Tip: For a double crunch, repeat the coating process by dipping the chicken back into the marinade and flour mixture.
Achieving the Perfect Fry
Frying chicken can be intimidating, but these tips will help you master it.
- Heat the oil: Pour vegetable oil into a deep fryer or skillet until it’s about two inches deep. Heat to 350°F (175°C) use a thermometer for accuracy.
- Fry in batches: Place 2-3 pieces of chicken into the oil, ensuring they don’t overcrowd. Fry for 8-10 minutes, flipping occasionally, until golden brown and fully cooked.
- Drain properly: Transfer fried chicken to a wire rack placed over a baking sheet to drain excess oil while keeping it crispy.
Pro Tip: Avoid paper towels they trap steam and can make your chicken soggy.
Even the best cooks face challenges. Here’s how to troubleshoot:
- Chicken not crispy enough? Ensure your oil is hot enough and don’t overcrowd the pan.
- Chicken overcooked or undercooked? Use a meat thermometer; the internal temperature should reach 165°F (74°C).
- Flavors not coming through? Don’t skimp on seasonings. Adjust salt and spices to your liking.
Variations of Fried Chicken Without Buttermilk
Fried chicken is versatile! Here are some twists to try:

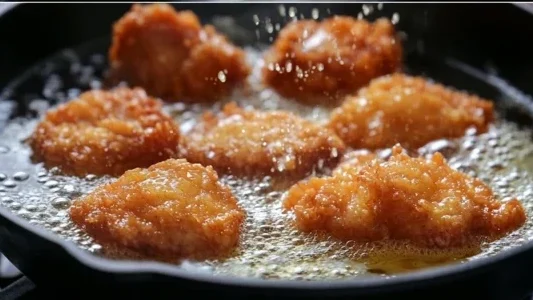
“Juicy chicken sizzling in hot oil within a cast-iron skillet, transforming into golden, crispy perfection comfort food made with love and tradition.”
- Spicy Fried Chicken: Add cayenne pepper or chili powder to the marinade for extra heat.
- Gluten-Free Fried Chicken: Swap the flour for a gluten-free blend.
- Oven-Baked “Fried” Chicken: Coat chicken in breadcrumbs and bake at 400°F (200°C) for a healthier option.
Perfect Fried Chicken Without Buttermilk
Congratulations you’ve just mastered the art of fried chicken without buttermilk! With these tips, you can make a dish that’s crispy, juicy, and packed with flavor, whether it’s for a family dinner or a weekend treat. Don’t be afraid to experiment with spices and techniques to make it your own.
Final Tip: Cooking is all about having fun and making something you’ll love. So go ahead, roll up your sleeves, and get frying!
Common Problems and Solutions
Cooking fried chicken without buttermilk can come with its own set of challenges. Let’s dive deeper into common problems and how to fix them:
Chicken Coating Falls Off
Few things are as disheartening as pulling your chicken out of the fryer and seeing the crispy coating flake off. To avoid this, follow these steps:
- Dry Your Chicken Thoroughly: Before marinating, pat the chicken dry with paper towels. Excess moisture prevents the coating from sticking.
- Rest the Coated Chicken: After dredging your chicken in the flour mixture, let it rest on a wire rack for 10-15 minutes. This helps the coating set.
- Handle with Care: Use tongs or a spatula to turn the chicken while frying. Avoid using forks, as piercing the meat can cause the coating to peel off.
Pro Tip: Double coating (marinating, then dredging, and repeating) creates an extra-thick crust that stays put during frying.
Chicken Too Greasy
Greasy fried chicken can ruin your meal, but it’s usually easy to fix. Here’s how:
- Use the Right Oil Temperature: Always fry at 350°F (175°C). If the oil is too cool, the chicken will absorb more oil. A kitchen thermometer is your best friend here.
- Drain Properly: Place fried chicken on a wire rack instead of paper towels. Paper towels trap steam, which makes the chicken soggy and oily.
Chicken Undercooked or Overcooked
No one wants raw or dry chicken. To ensure perfect doneness:
- Use a Meat Thermometer: The internal temperature of the chicken should reach 165°F (74°C). Insert the thermometer into the thickest part of the meat, avoiding bones.
- Fry in Batches: Overcrowding the pan lowers the oil temperature, which can lead to uneven cooking. Give each piece of chicken enough room to fry properly.
Variations of Fried Chicken Without Buttermilk
While traditional fried chicken is delicious, variations can add exciting new flavors or meet dietary preferences. Here are some ideas to spice up your recipe:
Spicy Fried Chicken
If you’re a fan of heat, adding spice to your chicken is a no-brainer. Here’s how to do it:
- In the Marinade: Add cayenne pepper, chili powder, or a few dashes of hot sauce to the marinade.
- In the Coating: Mix crushed red pepper flakes or smoked paprika into the flour mixture.
- After Frying: Sprinkle finished chicken with your favorite spicy seasoning or serve with a spicy dipping sauce like Sriracha mayo or buffalo sauce.
Gluten-Free Fried Chicken
For those with gluten sensitivities or preferences, this recipe is easily adaptable:
- Use Gluten-Free Flour: Replace all-purpose flour with a gluten-free alternative such as rice flour, almond flour, or a pre-made gluten-free flour blend.
- Enhance the Crunch: Add an extra tablespoon of cornstarch to the gluten-free flour for a super crispy texture.
Oven-Baked “Fried” Chicken
Want to skip the deep frying? Baking can give you a crispy crust without the extra oil:
- Preheat your oven to 400°F (200°C).
- After marinating, coat the chicken in panko breadcrumbs or crushed cornflakes instead of flour.
- Place the coated chicken on a wire rack over a baking sheet and bake for 25-30 minutes, flipping halfway through.
Fun Twist: For even crispier results, lightly spray the chicken with cooking oil before baking.
Air-Fried Chicken
Air fryers are a healthier alternative to deep frying, and they work wonders for fried chicken:
- Preheat your air fryer to 375°F (190°C).
- Coat the chicken as you normally would and place it in a single layer in the air fryer basket.
- Cook for 18-20 minutes, flipping halfway through, until the chicken is golden brown and cooked through.
Pro Tip: Air-fried chicken pairs perfectly with fresh coleslaw or a tangy dipping sauce.
Tips for Storing and Reheating Fried Chicken

“”Freshly fried chicken resting on a wire rack, allowing excess oil to drain and ensuring crispy perfection before serving or storage.”
Fried chicken is often best when fresh, but leftovers can still taste amazing if stored and reheated correctly. Here’s what to do:
How to Store Fried Chicken:
- Cool the Chicken First: Let the fried chicken cool completely before storing. Placing hot chicken in a container traps steam, which can make the crust soggy.
- Use Airtight Containers: Store the chicken in an airtight container or wrap it tightly in aluminum foil.
- Refrigerate or Freeze: Keep fried chicken in the fridge for up to 3 days or freeze it for up to 3 months.
How to Reheat Fried Chicken:
- In the Oven: Preheat your oven to 375°F (190°C). Place the chicken on a wire rack over a baking sheet and heat for 15-20 minutes.
- In an Air Fryer: Reheat at 375°F (190°C) for 5-7 minutes. The air fryer restores crispiness beautifully.
- Avoid Microwaving: While microwaving is faster, it makes the crust soggy. Stick with the oven or air fryer for the best results.
For more creative serving ideas, check out recipes like How to Make Madeline Cookies for delightful pairings with your Fried chicken.
Frequently Asked Questions
Let’s clear up some lingering questions about fried chicken without buttermilk:
Can I use yogurt instead of buttermilk?
Absolutely! Plain yogurt thinned with a little water or milk makes an excellent substitute. It adds the same tangy flavor and tenderizes the chicken just like buttermilk.
What’s the best oil for frying?
Neutral oils with a high smoke point, like vegetable oil, canola oil, or peanut oil, are ideal. They don’t overpower the chicken’s flavor and withstand high temperatures.
How do I ensure my chicken is fully cooked?
The easiest way is to use a meat thermometer. Insert it into the thickest part of the meat, avoiding the bone, to ensure an internal temperature of 165°F (74°C).
Can I make fried chicken ahead of time?
Yes! You can fry the chicken a few hours ahead and store it at room temperature. Reheat it in the oven at 375°F (190°C) for 10-15 minutes to restore crispiness.

Fried Chicken Recipe Without Buttermilk
Ingredients
- – 4 bone-in skin-on chicken pieces (legs, thighs, or breasts)
- – 1 cup milk or plain yogurt diluted with water
- – 1 tbsp lemon juice or vinegar
- – 1 ½ cups all-purpose flour
- – 1 tsp salt
- – 1 tsp black pepper
- – 1 tsp garlic powder
- – 1 tsp onion powder
- – 1 tsp smoked paprika
- – ½ tsp cayenne pepper optional
- – 2 eggs
- – Vegetable oil for frying
Instructions
- 1. In a bowl, mix milk with lemon juice or vinegar. Let sit for 5 minutes to create a tangy marinade.
- 2. Submerge chicken pieces in the milk mixture and marinate for at least 30 minutes.
- 3. In another bowl, whisk eggs and set aside.
- 4. In a shallow dish, combine flour, salt, pepper, garlic powder, onion powder, paprika, and cayenne.
- 5. Remove chicken from the milk mixture, dip in eggs, then coat thoroughly in the flour mixture.
- 6. Heat oil in a deep pan to 350°F (175°C).
- 7. Fry chicken in batches for 12-15 minutes, turning occasionally, until golden brown and fully cooked (internal temp 165°F/75°C).
- 8. Drain on a paper towel and let rest for 5 minutes before serving.
Notes
Conclusion: Perfect Fried Chicken Without Buttermilk
Congratulations you’ve now mastered fried chicken without buttermilk! Whether you’re avoiding dairy, don’t have buttermilk on hand, or just want to try something new, this recipe offers all the crispiness and flavor you love in fried chicken.
Remember, cooking is about experimenting and having fun. Add your favorite spices, try different coatings, or switch up the cooking methods to make the recipe your own. With these tips and variations, you’re sure to create a dish that’s a hit at the dinner table.
So what are you waiting for? Gather your ingredients, preheat that oil (or oven or air fryer), and get ready to make fried chicken that’s crispy on the outside, juicy on the inside, and packed with flavor.
Final Thought: Don’t forget to share this recipe with friends and family. They’ll thank you for it and probably ask for seconds!

