Making your own jerky at home might sound tricky, but it’s actually pretty simple and way more fun! This article will guide you through every step of creating a homemade deer jerky recipe that’s full of flavor, safe to eat, and easy enough for anyone to make even if it’s your first time.
We’ll cover everything from picking the right cut of deer meat, adding just the right seasonings, using tools like a dehydrator or oven, and even how to store your jerky so it stays fresh. Plus, you’ll learn cool ways to eat it, how healthy it really is, and answers to common jerky questions.
Let’s dive in!
What Is Deer Jerky?
What makes deer jerky special?
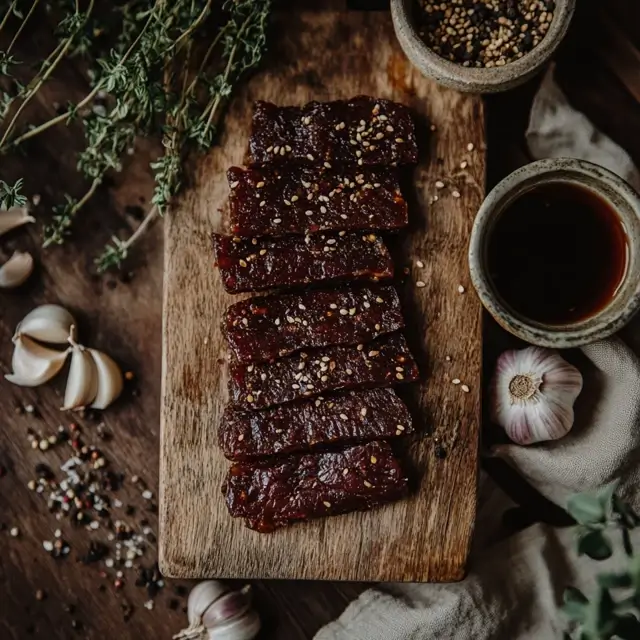
“This image shows the ingredient prep stage of the homemade deer jerky recipe, styled with a clean and appetizing look.”
Deer jerky is made from venison, which is the meat of a deer. Unlike store-bought beef jerky, homemade deer jerky has a leaner taste, less fat, and you control all the flavors. That means no weird ingredients or extra sugar just tasty meat that’s good for snacks, trips, or lunchboxes.
“Jerky is just dried meat but homemade deer jerky takes it to the next level with bold flavors and clean ingredients you can trust.”
Venison jerky also has a slightly gamey flavor. That’s what gives it its wild, outdoorsy taste. Many people say deer jerky tastes richer than beef and has a meaty chew that keeps you coming back for more.
Why make jerky at home instead of buying it?
Well, for starters it’s cheaper! Store-bought jerky can cost a lot for a tiny bag. But when you make it yourself, you get way more for your money.
Also, when you make jerky at home, you can pick the flavors you like. Want it spicy? Add more pepper. Like it sweet? Use a bit of honey. You’re the boss!
Here’s why homemade is better:
- You control the ingredients – no preservatives or extra salt.
- It’s fun to make – a cool kitchen project for weekends or family time.
- It’s healthier – deer meat is lean, high in protein, and low in fat.
- Perfect for hunters – great way to use wild game.
“Homemade jerky is one of the smartest (and tastiest) ways to use your deer meat after a hunt.”
And don’t worry you don’t need fancy tools. A regular oven will do the trick!
Choosing the Best Deer Meat for Jerky
What cuts of venison are best for jerky?
To make the tastiest homemade deer jerky recipe, you need to start with the right cut of meat. The best parts of the deer for jerky are lean, firm, and low in fat. Why? Because fat goes bad quicker and can ruin your jerky.
Here are top cuts to choose from:
| Cut of Venison | Why It’s Great for Jerky |
|---|---|
| Backstrap | Super lean, tender, easy to slice |
| Eye of Round | Very lean, uniform texture |
| Bottom Round | Budget-friendly and meaty |
| Top Sirloin | Rich flavor, low-fat content |
“The leaner the meat, the longer your jerky lasts and the better it tastes!”
Avoid fatty or sinewy parts of the deer. They don’t dry evenly and can turn chewy in a bad way. If you’re not sure, just go for anything that looks firm and smooth, without streaks of white fat.
How to prepare venison before marinating?
Before making jerky, you’ve got to prep the meat just right. It might take a little extra time, but it’s totally worth it.
Here’s what to do:
- Trim all the fat – Every bit! Fat makes jerky spoil faster.
- Partially freeze the meat – This makes it easier to cut into thin slices.
- Slice evenly – Go about 1/8 to 1/4 inch thick. Thinner slices dry faster.
- Cut with or against the grain? –
- With the grain = Chewy jerky
- Against the grain = Softer jerky
If you’re making a big batch, use a sharp knife or a meat slicer to get even strips.
“Even slices mean your jerky dries evenly no burnt edges or soggy spots!”
Next up, let’s talk about flavors and marinades. That’s where the magic happens.
Ingredients for a Homemade Deer Jerky Recipe
Basic ingredients for a classic deer jerky flavor
A good homemade deer jerky recipe starts with a solid marinade. This is where you’ll get all that bold, smoky, sweet, or spicy flavor. Keep it simple at first then go wild once you get the hang of it!
Here’s a basic marinade that works like a charm:
| Ingredient | Quantity | Why It’s Used |
|---|---|---|
| Soy Sauce | 1/2 cup | Salty base, adds umami |
| Worcestershire | 1/4 cup | Deep flavor, classic jerky taste |
| Brown Sugar | 2 tbsp | Adds sweetness and balance |
| Black Pepper | 1 tsp | Just enough heat |
| Garlic Powder | 1 tsp | Extra flavor punch |
| Onion Powder | 1 tsp | Boosts the savory depth |
| Liquid Smoke | 1 tsp | Gives it that smoked-meat vibe |
Mix it all up in a bowl or zip bag. Then, toss in your sliced venison and let it sit in the fridge for at least 8–24 hours. The longer it marinates, the more flavor it soaks up!
“Let the meat marinate overnight. That’s where the real flavor magic happens.”
Tasty variations to try (sweet, spicy, smoky)
Once you’ve mastered the basic version, it’s time to mix things up a bit. Try adding some of these:
- Hot sauce or crushed red pepper for a spicy kick
- Maple syrup or honey for sweet jerky
- Apple cider vinegar for a tangy bite
- Teriyaki sauce for a rich, Asian-inspired taste
- Smoked paprika to turn up that campfire flavor
You can even mix and match sweet and spicy is a fan favorite.
“Your jerky, your rules. Don’t be afraid to experiment and find your signature flavor.”
Ready to fire up your oven or dehydrator? In the next part, we’ll walk through how to make deer jerky at home step by step.
How to Make Deer Jerky at Home
Step-by-step instructions for making deer jerky
Once your meat is sliced and soaked in marinade, it’s time to turn it into jerky! Don’t worry this part’s super easy. Whether you’ve got a fancy dehydrator or just a regular kitchen oven, the results will still be tasty.
Here’s how to make a homemade deer jerky recipe from start to finish:
- Drain the marinade – Take your venison out of the marinade and pat it dry with paper towels.
- Lay out the slices – Place meat strips on dehydrator trays or wire racks over baking sheets.
- Don’t overlap – Leave space between each slice so air can flow.
- Preheat your tool –
- Dehydrator: Set to 160°F (71°C)
- Oven: Use the lowest setting (usually 170°F)
- Dry it out – Let it dry for 4 to 6 hours. Flip halfway if using an oven.
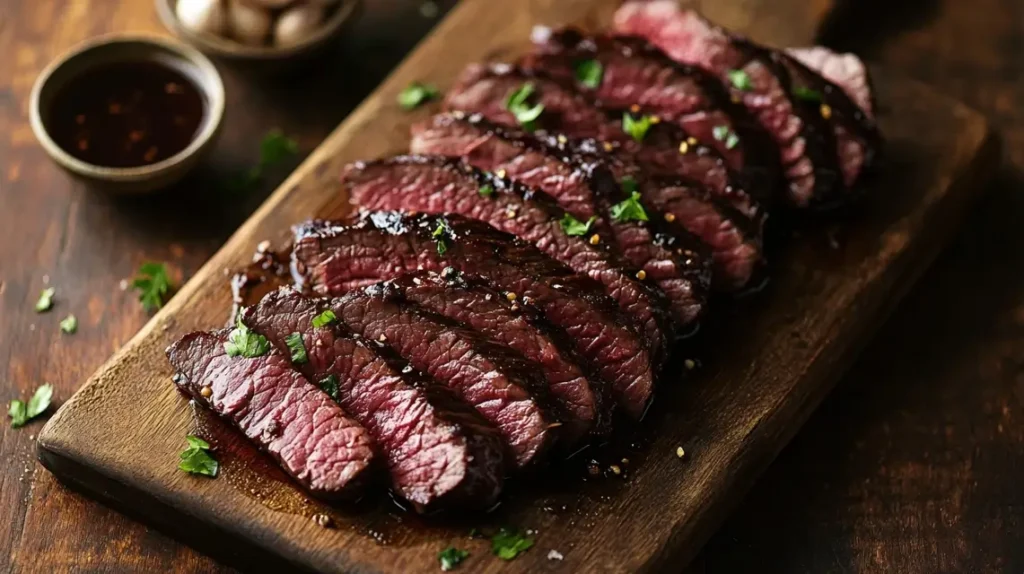
“The jerky is done when it bends without snapping and feels dry but not hard.”
Make sure it cools completely before storing. Otherwise, moisture can build up and make the jerky go bad faster.
How long to dehydrate deer jerky properly?
Dry time can vary depending on slice thickness and your equipment. Thinner slices = quicker drying. On average:
| Method | Time Needed |
|---|---|
| Dehydrator | 4 to 6 hours |
| Oven (low heat) | 5 to 7 hours |
| Air drying (old-school style) | Not recommended for safety |
To be extra safe, some people pop their jerky in the oven at 275°F for 10 minutes after drying. That’s an extra step to kill off any bacteria.
“When in doubt, test it! Jerky should bend and crack but never break like a chip.”
For more delicious recipes, check out Yuum Recipes’ full collection.
Tools You Need to Make Homemade Jerky
Using a dehydrator vs. oven for jerky
So, which one’s better a dehydrator or an oven? Honestly, both get the job done. It really depends on what you’ve got at home.
Let’s compare:
| Tool | Pros | Cons |
|---|---|---|
| Dehydrator | Made for jerky, even drying | Can be pricey |
| Oven | Most people already have one | Needs more checking & flipping |
If you’re serious about making jerky often, a dehydrator is worth the upgrade. But if you’re just trying out this homemade deer jerky recipe for fun? The oven works fine!
“Great jerky doesn’t need fancy gear just love, patience, and a little heat.”
Other helpful tools to have
Besides the oven or dehydrator, a few small tools can really help:
- Sharp knife or meat slicer – for even, thin slices
- Cutting board – sturdy and safe
- Zip-top bags or airtight containers – for marinating and storing
- Wire racks – if using an oven, these help air flow around the meat
Want to make jerky easier? Try these bonus tips:
- Freeze your meat for 30–60 minutes first it’ll slice like a dream.
- Use a paper towel to blot extra marinade before drying. That speeds things up!
- Rotate your trays halfway through if your oven has hot spots.
“The right tools make jerky day smooth, but it’s your flavor that makes it shine.”
Coming up next: expert tips on how to make the best jerky every time and how to store it like a pro.
Tips to Make the Best Homemade Deer Jerky
How to slice meat the right way
If you want great jerky, how you slice the meat really matters. Even before you add the marinade or turn on the oven, this step can make or break the texture.
Here’s how to slice like a pro:
- Partially freeze your meat – This makes it way easier to cut thin slices.
- Use a sharp knife or slicer – Dull blades squish the meat instead of slicing it cleanly.
- Cut across the grain for tender jerky – That means cutting against the lines in the meat.
“Jerky that’s cut across the grain is softer and easier to chew especially for kids.”
If you like chewier jerky, slicing with the grain will give you that classic tear-apart texture. It’s all about what you like!
Marinating tips for more flavor
The marinade is where your homemade deer jerky recipe gets its delicious flavor. But to make it really pop, don’t rush the soak.
Try these smart tips:
- Let it marinate overnight – At least 8 hours is best. Up to 24 hours = more flavor!
- Use a sealed container or zip bag – This keeps the meat covered in the marinade.
- Turn the meat halfway – That helps every piece soak up the flavors evenly.
- Don’t reuse the marinade – Always toss it after use, for safety.
“The longer it soaks, the bolder it tastes. Give it time to do its thing!”
Some folks even vacuum seal the meat with the marinade. It’s not a must, but it can boost the flavor big time.
Storing and Keeping Deer Jerky Fresh
How long does homemade jerky last?
You’ve put time and love into making your homemade deer jerky recipe. Now, how do you keep it fresh and safe to eat?
Good news if stored right, jerky can last a long time! Here’s what you can expect:
| Storage Method | How Long It Lasts |
|---|---|
| Room temperature (sealed bag) | 1 to 2 weeks |
| Fridge (airtight container) | Up to 1 month |
| Freezer (vacuum-sealed) | 3 to 6 months or more |
“Jerky should be kept cool, dry, and away from air to stay fresh and tasty.”
Always make sure the jerky feels completely dry before storing. If it’s still a little moist, mold could grow.
Best ways to store deer jerky safely
To make your jerky last, proper storage is key. Use these methods:
- Use zip-lock bags or mason jars – These keep out air and moisture.
- Add a paper towel inside – It soaks up leftover moisture.
- Vacuum-seal for long-term storage – Best option if you’re freezing batches.
Also, store it in small portions. That way, you only open what you need and keep the rest sealed tight.
“Airtight is right! Keep it sealed, and your jerky will stay good for weeks.”
Pro tip: Label your bags with the date you made it. That way, you’ll always know how fresh it is.
Homemade Deer Jerky Recipe for Kids and Beginners
Easy deer jerky recipe anyone can follow
If this is your first time making jerky, don’t worry it’s super simple! This homemade deer jerky recipe is great for beginners, even kids (with an adult helping, of course). Let’s keep it short and sweet.
Quick & Easy Deer Jerky Recipe:
| Ingredient | Amount |
|---|---|
| Sliced venison | 1 pound |
| Soy sauce | 1/3 cup |
| Worcestershire sauce | 2 tbsp |
| Brown sugar | 1 tbsp |
| Garlic powder | 1 tsp |
| Onion powder | 1 tsp |
| Black pepper | 1/2 tsp |
Steps:
- Mix all marinade ingredients in a bowl.
- Add meat slices and stir well.
- Cover and let it sit in the fridge overnight.
- Lay strips flat on oven racks or dehydrator trays.
- Dry at 160°F for 5 to 6 hours.
- Let it cool, then store in a sealed bag or jar.
“Even kids can help mix the marinade it’s like a flavor science experiment!”
This is the easiest way to try your first homemade deer jerky recipe. Once you get comfy, you can start adding your own twist.
Mistakes to avoid the first time you make it
It’s okay to mess up a little the first time. But if you want to avoid common goof-ups, keep these tips in mind:
- Don’t skip trimming the fat – It makes jerky spoil faster.
- Slice the meat evenly – Thick pieces don’t dry well.
- Don’t over-marinade – More than 24 hours can make it too salty.
- Make sure it’s dry – If it’s still soft or wet, it’s not done yet!
“Practice makes jerky perfect. You’ll get better every batch!”
And remember have fun! Jerky-making is more like an adventure than a recipe.
Is Deer Jerky Healthy?
Nutrition facts about deer jerky
One big reason people love a homemade deer jerky recipe is because it’s not just tasty it’s also good for you. Venison is naturally lean and packed with protein.
Here’s a simple look at what’s in 1 ounce (28g) of plain deer jerky:
| Nutrition Info | Amount |
|---|---|
| Calories | ~80 |
| Protein | 12–15g |
| Fat | 1–2g |
| Carbs | 2–4g (varies by recipe) |
| Sodium | ~300–400mg |
“Homemade jerky has fewer additives than store-bought snacks and more real meat.”
Because you make it at home, you get to choose how much salt, sugar, and spice to use. That means you can make it fit your diet better.
How it compares to beef jerky
Venison jerky is often leaner than beef jerky. It’s also lower in calories and fat, especially if you trim it well. And if the deer is wild, you’re eating meat that’s free-range and hormone-free.
Here’s a quick side-by-side:
| Type | Fat (per oz) | Protein (per oz) |
|---|---|---|
| Deer Jerky | 1–2g | 12–15g |
| Beef Jerky | 4–6g | 9–13g |
So if you’re looking for a protein-packed, guilt-free snack, homemade deer jerky is a smart pick.
“Think of it as nature’s protein bar just meat, heat, and a little love.”

Easy Homemade Deer Jerky
Equipment
- Mixing Bowl
- Zip-top Bag or Container
- Oven or Dehydrator
- Wire Rack or Baking Sheet
Ingredients
Main Ingredients
- 1 lb sliced venison deer meat
- ⅓ cup soy sauce
- 2 tbsp Worcestershire sauce
- 1 tbsp brown sugar
- 1 tsp garlic powder
- 1 tsp onion powder
- ½ tsp black pepper
Instructions
- In a bowl, mix soy sauce, Worcestershire sauce, brown sugar, garlic powder, onion powder, and black pepper to make marinade.
- Add venison slices to the marinade and toss to coat. Cover and refrigerate for at least 8 hours or overnight.
- Preheat oven or dehydrator to 160°F (71°C). Line baking sheet with foil and place a wire rack on top, or use dehydrator trays.
- Arrange marinated venison slices in a single layer. Dry in oven or dehydrator for 2.5 to 4 hours, flipping once, until firm and dry but still slightly pliable.
- Cool jerky completely before storing in an airtight container or vacuum-sealed bag.
Notes
Conclusion
Making your own homemade deer jerky recipe is more than just a cooking project it’s a rewarding, tasty, and healthy way to enjoy wild game. From slicing the meat to seasoning and drying, each step lets you add your own flavor and style.
You don’t need fancy tools or tons of experience. With a little care and patience, anyone yes, even beginners and kids
can create jerky that’s better than store-bought.
So grab some venison, mix up your marinade, and give it a shot. Once you taste that chewy, savory goodness, you’ll be hooked!
“Jerky isn’t just a snack it’s a tradition, a craft, and the perfect bite to take on your next adventure.”